
South West Pacific: 1945
2 RAR had its origins as 66 Aust Inf Bn, which was raised on 16 Oct 45 at Labuan in British North Borneo before joining 34th Aust Inf Bde on the island of Morotai in the Molluccas archipelago of Indonesia. Volunteers for the Battalion came mostly from men of the 9th Division, 2nd AIF.
Japan (BCOF): 1946-1948
The Battalion participated in the occupation of Japan as part of 34 Aust Inf Bde from Feb 46 to Dec 48. The 66th Battalion was stationed at Kure (once the largest naval base in Japan) and later stationed in the prefecture of Hiroshima, which was divided into three areas of unit responsibility. The 65th Battalion guarded the eastern area, the 66th the central region and the 67th Battalion, the western areas. Also, during this time the battalion was temporarily garrisoned at Tokyo and Ebisu, as part of its occupation duties. Tasks involved guarding BCOF headquarters on the island of Eta Jima, finding a midget submarine base (at Kanokawa) on the island, along with extensive ammunition dumps and weapons. They also patrolled areas where it was suspected the 'black market' was rife, with, on occasion, the battalion rotating with the others to do guard duties at the Imperial Palace in Tokyo. They also established an NCO school at Hachihonmatsu and conducted range practices and courses at Haramura.
In Sep 1948 it was announced the battalion would be withdrawn from BCOF and would return to Australia. As with the 65th, an advance party departed in September, with transfers to the 67th Battalion beginning. Both the 65th and 66th departed Japan on 7th Dec, aboard HMAS 'Kanimbla'.
On 23 Nov 48 the 66th Battalion became the 2nd Battalion, The Australian Regiment.
Australia: 1948-1953
In Dec 48 the unit returned to Australia and was located at Puckapunyal in Victoria. The Battalion became the 2nd Battalion, The Royal Australian Regiment on 10 Mar 49 with approval being given to add the prefix 'Royal' to the existing title. 2 RAR remained at Puckapunyal until Mar 53 as part of 1 Indep Inf Bde Gp. It was responsible for the training of recruits from the Southern States; and later, recruits for the Battalions fighting in Korea.
Korea: 1953-1954
On 5 Mar 53 the Battalion embarked for Pusan, Korea on MV 'New Australia' and arrived on 17 Mar 53. A soldier named Private G. Belville stowed away on board because he had been posted out of the unit a few days before. He was fined five pounds and taken back on strength. In 1957, on graduating from OCS, he served as an officer in the Battalion for a short period. He was killed in action in 1966 as a Captain serving with the Australian Army Training Team in South Vietnam.
On 21 Mar 53 detachments from 1 RAR, 2 RAR and 3 RAR paraded together on the 1RAR parade ground at Camp Casey. This was the first occasion in which all the Battalions of The Royal Australian Regiment had paraded together and, on this occasion, all were on war service.
In Apr 53 the Battalion moved into the line, as part of 28BRITCOM Bde, 1 COMWEL Div, relieving a French Battalion. It was noted that artillery and mortar reports became timelier and more accurate from the rifle companies after mortar fire had damaged C Company's beer ration in early May 53.
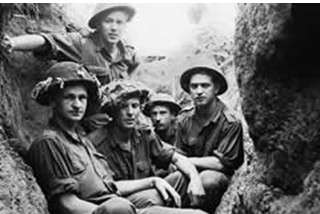
The Hook
On 9 Jul 53 2 RAR relieved the 1st Battalion, The King's Regiment around 'The Hook' feature, the left flank of 1 COMWEL Div. The Battalion was subjected to intermittent artillery, mortar and infantry attacks leading up to the battle of 'The Hook' on 24, 25 and 26 Jul 53. Coinciding with attacks on 7 US Marine Regt, on the Battalions left, 2 RAR was heavily attacked with artillery concentrations and infantry during the night of the 24th and the early hours of the 25th Jul 53.
The reserve company from 1 Durham Light Infantry (DLI) came under command 2 RAR at midnight. The enemy objectives were the feature 'Boulder City' in the US Marine Sector and 'POINT 121' in the 2 RAR Sector. All attacks were repulsed with heavy enemy casualties by the morning of the 25th and the reserve 2nd company from 1 DLI was withdrawn.
The enemy resumed heavy attacks on the Marines and the 2 RAR sector during the night of the 25th. D Company, 3 RAR came under command at 0100 hours and again a company from 1 DLI was warned but did not move up. These attacks were again beaten back with severe enemy casualties and major attacks ceased by the morning of the 26th. For its performance under these attacks 2 RAR won the battle honour 'SAMICHON'.
The 'Battle of the Hook' proved to be the last major action of the Korean War, with an armistice being declared the next day (27th July 1953) and signed 17 days after the battle.
Australia: 1954-1955
The Battalion sailed for home on 6 Apr 54 on MV 'New Australia', arriving at Brisbane on 16 Apr 54 and moved into Enoggera Barracks. The Jungle Training Centre had recently been re-established at Canungra near Brisbane and 2 RAR was the first unit to pass through this reactivated centre.
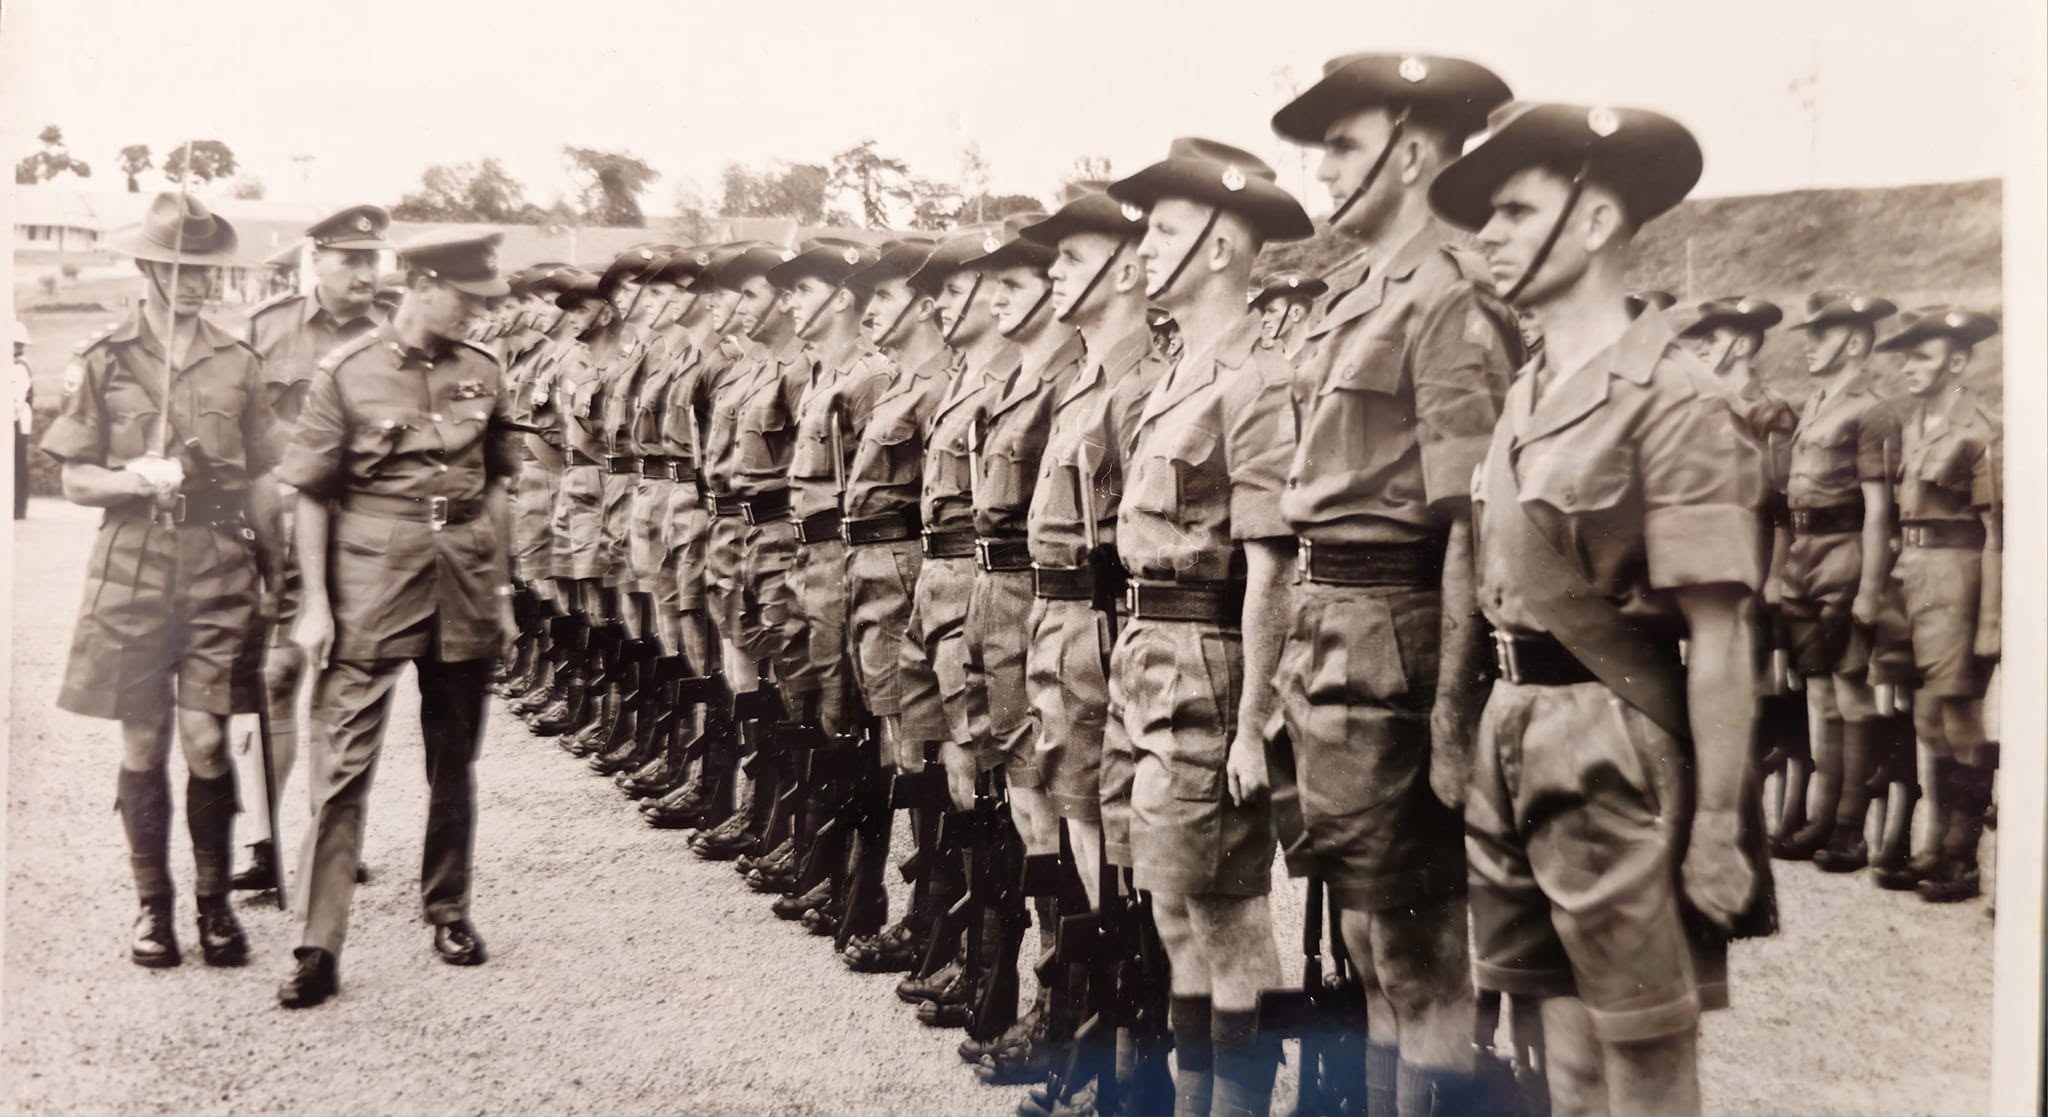
Colours were presented to the Battalion at Victoria Park, Brisbane on 28 Sep 55 by the Governor-General Field Marshal Sir William Slim, GCB, GMG, GCVO, GBE, DSO, MC, KStJ. The Battalion then became the first regular unit in Australia to receive the Queens' and Regimental Colours. After receiving the Colours the Battalion marched through Brisbane, its last public appearance before proceeding overseas again.
Malaya - First Tour “Malayan Emergency’ 1955-57
The Battalion was the first Australian unit to serve in Malaya since World War II. It was also the first time for Australian troops to become members of an overseas, operational part of the British Commonwealth Far Eastern Strategic Reserve. 2 RAR embarked in Brisbane in Oct 55 and moved to Penang as part of 28 COMWEL Ind Inf Bde.
The Battalion entered operations on 3 Jan 56 in the Kulim area. B Company had the first successful contact with the Communist Terrorist (CT) enemy during 'Operation Deuce'. During this operation a party of Sarawak Rangers were attached as scouts and proved very valuable. This operation concluded for the Battalion on 30 Apr 56 when a Battalion of the Malay Regiment relieved it.
2 RAR immediately participated in a 28 COMWEL Indep Inf Bde operation called 'North Shark' at Kuala Kangsar in the state of Perak. Of note, on 22 Jun 56 in the police district of Sungai Siput a Military Cross and two Military Medals were awarded to A Coy, 2 RAR: LT A.W. (Wally) Campbell and PTEs Falk and Pennant. Initially, a mine explosion and assorted weapons fire were sprung on the Australians and their Iban trackers, causing two deaths and a number of injuries to A Coy. A counter-ambush by LT Campbell and his men surprised the CT's, killing several and wounding an undetermined number. This eventually allowed for the successful extraction of the wounded and the rest of the patrol. Two days later, in the state of Kroh, CPL Des Kennedy (SPT COY) was awarded a Military Medal, for conspicuous bravery, during an action in which over thirty CTs were discovered in an enemy camp. In the initial exchange of fire, two members of his Coy were killed and several wounded. CPL Kennedy fought his way through the camp, extricated his men without further problems and although slightly wounded, he was the last man to board the waiting helicopter.
Operations were continued at Sungei Siput from 27 Oct to 2 Dec 56. The unit was withdrawn from 'Operation North Shark' for rest and retraining at Minden Barracks and was based at Penang. On 4 Feb 57 the unit returned to 'Operation North Shark' relieving the 1st Battalion, Royal Lincolns.
The unit also participated in 'Operation Rubberlegs' from 7 Mar to 17 Mar 57. On 1 Aug 57 2 RAR moved back to Butterworth for rest and retraining and remained at Butterworth/Penang until late Oct 57. During this tour of duty, the battalion lost seven men killed in action (KIA). Also, during this tour official approval was received for the 2 RAR flag to be black, with the numbers to be in the upper hoist canton and The Regimental Crest in the centre.
On 31 Oct 57 the Battalion returned to Australia and marched through Sydney to a ticker–tape welcome from 100,000 spectators. 2 RAR returned to barrack life at Holsworthy, again as 3rd part of 1 Indep Inf Bde Gp.
In 1960, a major re-organisation of the Australian Army saw the battalion became a Pentropic unit, which would allow it to become, a lean, powerful, versatile organization, readily adaptable to any type of operation. Later, this framework was re-organised yet again, as it was seen to be as obsolete as the outgoing British standard infantry division framework. Hence the changes back to a BCFESR Tropical Establishment in Jun 61, in preparation for its second tour of Malaya.
Malay - Second Tour ‘Confrontation’ 1961-63
2 RAR was the first to serve two tours of Malaya. It joined 28 COMWEL Indep Inf Bde Gp at Terendak Camp near Malacca in Oct 61, under the 17th Gurkha Division. During this tour the brigade's emphasis was on air-mobile operations and inter-service co-operation. The battalion was allowed to have their families with them on this tour as well. Similarly, other battalions of the Far East Land Forces (FARELF) of Britain and New Zealand, along with their attachments, were stationed at the same camp. During operations, these units hunted the remnants of the communist terrorists (CTs) on the Thailand/Malaysia border. 2 RAR returned to Brisbane and Enoggera Barracks in August 1963 without suffering any loss of life. The unit then served as part of the 6 Task Force (TF), 1 Div.
South Vietnam - First Tour 1967 - 68
2 RAR remained at Enoggera until it embarked for operational service in South Vietnam on 19 May 67. On that day the unit sailed on the troop carrier HMAS Sydney to relieve the 6th Battalion serving with the 1st Australian Task Force at Nui Dat in Phuoc Tuy Province.
During this tour two companies of New Zealand Infantry were placed under command and 2 RAR became an ANZAC Battalion. Soldiers of 2 RAR/NZ (ANZAC) took part in 23 operations in Phuoc Tuy and Bien Hoa Provinces and maintained constant patrols and ambushes throughout their area of operations.
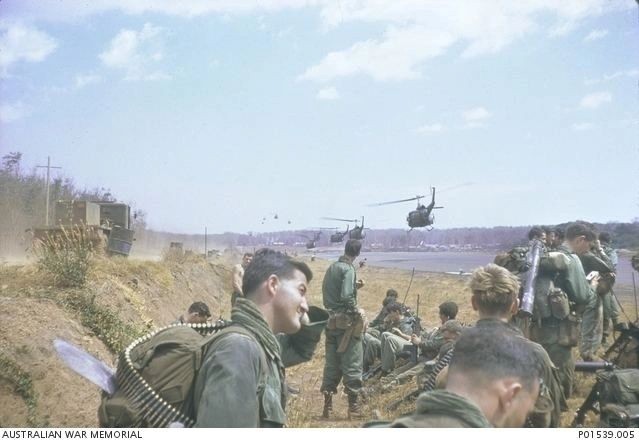
The Battalion's most successful operation was Operation 'Coburg' that took place in the area of the border between Bien Hoa Province and Long Kanh Province north west of Phuoc Tuy Province. This was a Task Force operation, the first in strength outside Phuoc Tuy Province.
This Task Force relieved the 199th Inf Bde (US) with the aim of denying the Viet Cong (VC) access to the area and sites from which they could direct rocket fire into the huge American bases at Long Binh and Bien Hoa.
During the operation the enemy launched the Tet Offensive. The number of contacts with the enemy rose sharply and instead of local force VC the unit began to meet well trained main force troops of 274th VC Regiment. 91 VC or North Vietnamese were killed and over 80 weapons captured. In this first tour the ANZAC Battalion killed 187 enemy, inflicted a further 60 confirmed WIA casualties, captured 12 prisoners and 190 weapons.
The Australians and New Zealanders had 28 soldiers killed during the tour. 4 RAR relieved the Battalion 1 Jun 68. On its return from Vietnam on 13 Jun 68 the Battalion again occupied an area of Enoggera Barracks prior to establishing itself at Lavarack Barracks, Townsville in Jun 69.
South Vietnam - Second Tour 1970 - 71
On 15 May 70, 2 RAR officially relieved 6 RAR and resumed the title of ANZAC Battalion with New Zealanders again under command. The second tour was focused mainly upon 'pacification', which sought to provide security of the struggling South Vietnamese state by seeking out and destroying the VC in their bases areas and isolating them from the ordinary civilian population. In a successful twelve months of operations against the enemy, including D440 and D445 VC Battalions, the unit killed 110 enemy troops and captured 23 for the loss of 13 soldiers killed. 4 RAR/NZ (ANZAC) took over operational responsibility from 2 RAR in May 71.
2/4RAR: 1973-1995
2 RAR returned to Australia to a near hostile population of anti-Vietnam rhetoric and abuse on the streets. In Dec 72, there was a change in Government and all Australian forces were withdrawn from Vietnam and the RAR was reduced from nine to six battalions and National Service was dissolved.
Home for 2 RAR was the new lines of accommodation in Lavarack Barracks, while those married members lived in the soon to be 'sprawling' suburbs of married-quarters near the barracks. With the reorganisation of the Army during 1973 due to the cessation of National Service, 2 RAR and 4 RAR were linked on 15 Aug 73 to form the 2nd/4th Battalion, The Royal Australian Regiment (2/4 RAR).
The new battalion was charged with the task of preserving the traditions, associations and museums of the two battalions from which it was formed. Between 1977 and 1979 the battalion concentrated on conventional warfare including night and mounted operations. In 1980 the unit was reorganised on light scales and trained as part of the Operational Deployment Force (ODF) in close country and conventional warfare operations.
Cambodia
12 members of the battalion deployed as Regimental Signalers, serving with a 'Force Communications Unit' as part of a UN plan to 'bring peace to the country and stage free and fair elections'. Spending long hours on the Laos - Thai border check - points, they also provided communications to Military Observers, Civilian Police and Electoral Teams. The medical evacuation of both UN and local people was sometimes necessary for them to arrange, erecting defences around their own compounds and of most importance, monitoring the murderous activities of Khmer-Rouge patrols, helped to pass the time.
Between May and July 1993, 12 Platoon, Delta Coy 2/4 RAR was deployed on OP Gemini. Led by LT Tom Biedermann, the platoon deployed to protect the assets of B SQN, 5 AVN Regt during Cambodia's dangerous election and political instability. Like the Regimental Signalers, they were on 'high - alert' throughout their deployment, having been fired on, while guarding the main airport at Phnom Penh and experiencing occasional harassing fire from passing vehicles.
Somalia: 1993
Members of the 2/4 RAR reinforced the 1 RAR Battalion (Battle) Group when they were warned out for service in Somalia on 16 December 1992, as part of a UN sanctioned, US led, multi-national force named OP 'Restore Hope'. The group began operations in the 'Humanitarian Relief Sector' (HRS), Baidoa, Somalia on 19th January 1993. The tour ceased operations on 14 May 1993 with the last elements of the Battalion Group departing the theatre on 20 May 1993.
United Nations Assistance Mission in Rwanda (UNAMIR) - 1994-1995
In 1994 the Australian Government approved the commitment of Australian troops to provide humanitarian support to the UN forces deployed in Rwanda. A Company 2/4 RAR deployed to protect the Australian Medical Support Force and the Commanding Officer, Operations Officer and other key personnel who were attached to the UN mission Headquarters, in this international relief effort. This deployment also drew on elements of Support Company and Administration Company and elements of the Battalion Headquarters of the 2/4 RAR. It was to provide humanitarian support to the UN forces deployed in Rwanda. The United Nations Assistance Mission in Rwanda (UNAMIR) saw a fitting need to respond to the massive human disaster, involving both the Tutsis and the Hutu tribes in that country.
Two separate contingents were involved, with the first being Alpha Coy, 2/4 RAR to UNAMIR 1 during Aug 94 - Feb 95. They were replaced by Bravo Coy, 2 RAR being deployed to UNAMIR 2 from Feb 95 to Aug 95. The notorious 'Kibeho' massacre that occurred during the ANZAC weekend of 1995, took place at a displaced persons (DP) camp, where it was estimated that some 3500 people died over a five day period. Bravo Coy providing medical and humanitarian assistance to the survivors and assisted in burying the dead. The Rwandan Peoples Army (RPA) conducted murder in the open, despite journalists, international witnesses and our own soldiers looking on in shock and frustration. There were no casualties to B Company.
B Coy, 2 RAR returned to Australia when the Australian commitment ended in Aug 95.
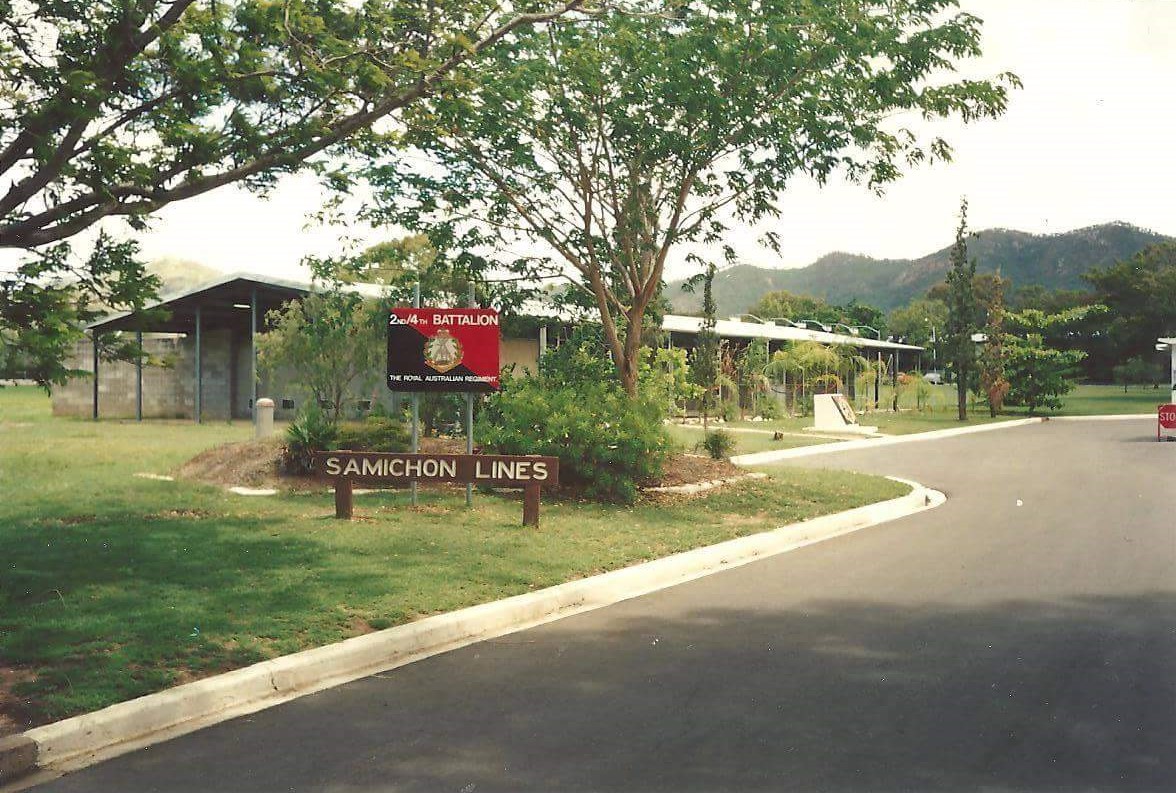
Re-Raising of 2 RAR - 1995
As a result of the 1994 Defence White paper 2/4 RAR was delinked on 1 Feb 95 to form 2 RAR and 4 RAR. The officers and soldiers of 2/4 RAR formed 2 RAR and remained part of 3 Brigade in Samichon Lines, Lavarack Barracks.
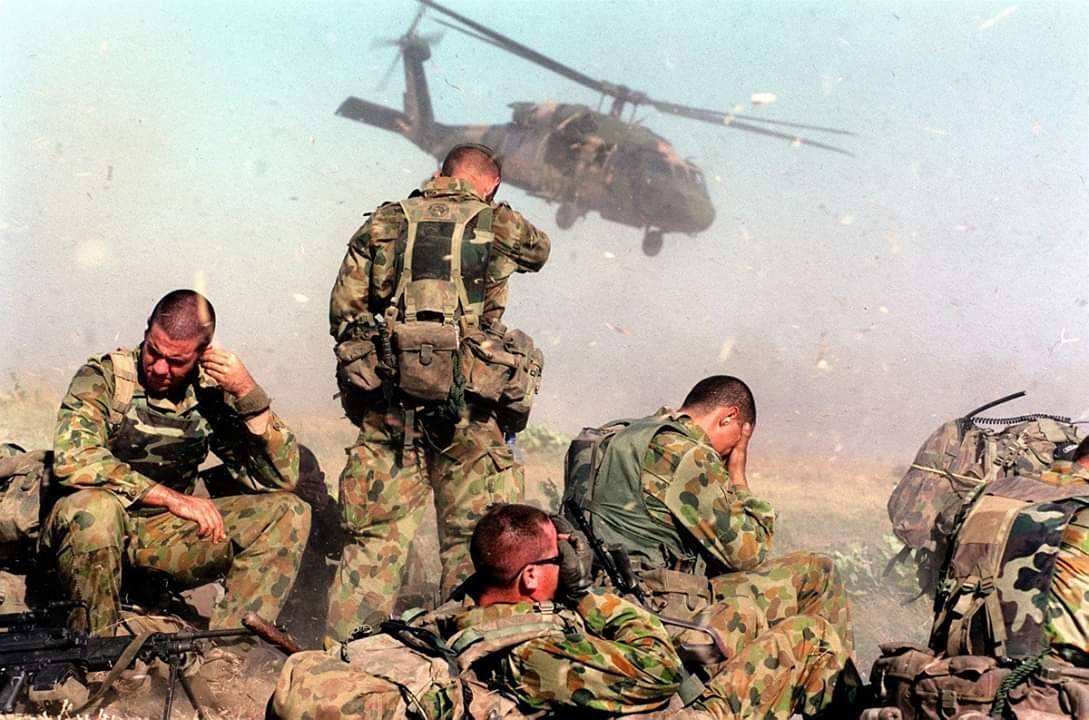
East Timor (OP WARDEN / STABILISE) - 1999
The Battalion was activated as 'Peacemakers' for operational serfide on 17 September 1999 and were deployed on 20 September 1999. The tour of duty lasted four months and was named "International Force East Timor (INTERFET). It was the first time the Battalion, as a whole, were deployed on operations since South Vietnam some 27 years earlier.
On 10 October 1999, 8 Pl C Coy reported the first operational contact since the Vietnam War. Located at the border town of Motaain, the contact was initiated by the TNI over an alleged border incursion by 2 RAR's forces. The contact resulted in two enemy killed and one wounded (militia), with no friendly casualties.
East Timor (OP TANAGER) 2001-02
2 RAR's second tour of East Timor was from 10 October 2001 to 04 May 2002. It was a very quiet and subdued tour in comparison to the first, with the heat and monsoon rains proving to be the major challenges.
The main achievement of 2 RAR Bn Gp was the transfer of control/administration functions back to the local community infrastructure of East Timor. Significant events during this tour included the Presidential Elections, won by Xuana Gusmao, and the lead up to independence on 20 May 2002.
East Timor (OP ASTUTE) 2006-2009
Charlie Company 2 RAR deployed on Operation ASTUTE with effect 25 May 06, as a sub unit of Battle group Faithful. This was a short notice deployment with a preparatory period of 15 days from the time the Company was warned for a possible deployment to East Timor (EM). On arrival, the Company was immediately tasked with providing perimeter security to the Northern area of the APOD as the Force continued to build up, prior to breaking out into our allocated areas of operation (AO). Charlie Company 2 RAR sustained operations of varying tempo and complexity for 144 days without respite, having conducted in excess of 600 patrols, 49 cordon and search operations, confiscating 354 weapons of varying type and detained 170 personnel.
Additional deployments occurred between Sep 2007 to Apr 2008 and again in May 2009 as part of Timor Leste Battle Group-III & VI respectfully.
Iraq - 2003-2019
Following the invasion of Iraq in 2003, 2 RAR provided Platoons to the security force protecting the Australian embassy in Baghdad – SECDET. The first deployment came in May 2003 when 5 Platoon, B Company deployed on SECDET 1 with elements of 2nd Cavalry Regiment. 1 Platoon, A Company deployed on the next rotation, SECDET II over the period September 2003 - January 2004 before handing over to A Coy, 3 RAR. During SECDET II, it was reinforced with a section from 3 RAR and this started the A and B rotations to SECDET allowing overlap.
In May 2006, 2 RAR's Headquarters, support company and a rifle company deployed to Iraq as part of the third rotation of the Al Muthanna Task Group. (OP CATALYST)
The battalion provided a sniper pair to SECDET XIV and then the battalion conducted a final SECDET in 2009-2010 when 2 RAR Bravo Company (minus) deployed as SECDET XV.
With shift to training missions in IRAQ, the battalion contributed a sniper pair to Task Group Taji 6 (TGT 6) in 2017 to 2018 and then provided a platoon to TGT 8 in 2018 to 2019. Rotations to Iraq by soldiers of the RAR concluded with TGT 10 in 2020.
Solomon Islands (OP Anode) 2003-04
In mid 2003, the Australian Government, along with others in the South Pacific region, responded to a request from the Prime Minister of the Solomons Islands for assistance in halting the escalating domestic lawlessness and violence in that country. A unique multi-national force of civilians, police and military known as the Regional Assistance Mission to the Solomon Islands (RAMSI) was deployed on Operation "HELPEM FREN". The military contribution to this deployment was named Operation ANODE.
On 24 July 2003, a Combined Joint Task Force (CJTF) based on the 2 RAR Ready Battalion Group landed from the air and sea onto Guadalcanal, in the Solomon Islands. Their mission was to assist a regional police force to re-establish the rule of law.
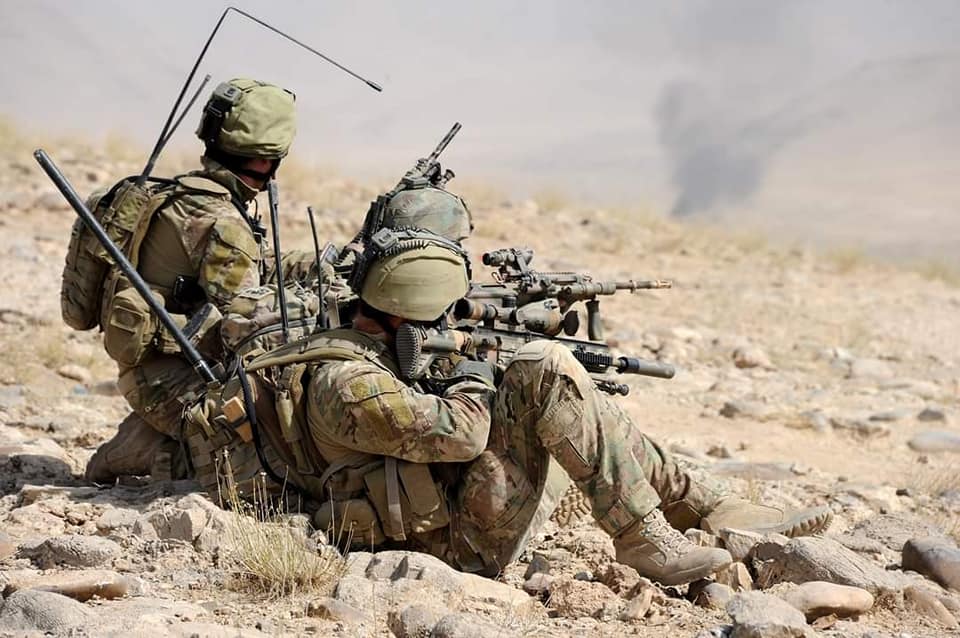
Afghanistan 2006-20
2RAR first deployed troops into Afghanistan with the first rotation to Afghanistan of RAR soldier on RTF 1. 2 RAR sent a sniper pair as part of this rotation. During RTF 2, a requirement of mortars eventuated and 2 RAR rapidly deployed a section of mortars to support the 1 RAR led RTF 2. These soldiers remained and served supporting RTF 3. From September 2007 to May 2008, elements of the battalion deployed to Afghanistan on Operation Slipper as part of RTF-3. The Security Task Group (STG) was made up of infantrymen from C Company 2 RAR, mortarmen and snipers from Support Company 2 RAR, IMV crews from 6 RAR and B Squadron, 3/4 Cavalry Regiment, cavalrymen from 2/14 LHR(QMI) and gunners from 4th Field Regiment. Elements from these units combined with elements of the 3rd Combat Engineer Regiment to form a combat team. The role of the STG was to provide the firepower and mobility necessary to facilitate the engineers' protected reconstruction. Intimately supported by combat engineers, construction engineers and explosive ordnance disposal technicians to make up Combat Team (CT) Spear, the STG was the fundamental enabler for the protected reconstruction effort.
In June to September 2009, 2 RAR deployed a composite security section (SECDET) to provide support to Special Operation Task Groups 9 and 10 (SOTG IX and X) Rotation for CAMP Russell Security.
In June 2011, the battalion deployed to Urozgan Province, Afghanistan as the Battle Group Headquarters and Combat Teams of Mentoring Task Force Three (MTF-3). The battalion returned to Australia in February 2012. Two members of the battalion, Private Matthew Lambert and Lance Corporal Luke Gavin were killed during this rotation. LCPL Gavin was killed during the largest green on blue experienced by Australian Forces.
In August 2019 in support of OP HIGHROAD, 2 RAR (Amphib) provided 3 Platoon, A Coy, 2 RAR (Amphib) to 8/9 RAR's led rotation of Force Protection Element 12 (FPE 12) – Plus 4 soldiers to the TAC – Air element.
FPE 12 was replaced with FPE 13 in February 2020. Due to COVID and the further downsizing of Operations in Afghanistan, only a section from 2 RAR (Amphib) deployed as part of a 5 RAR Platoon. This last formed element of 2 RAR (Amphib) returned from Afghanistan in September 2020.
2 RAR and 2 RAR (Amphib) have deployed some individuals to Afghanistan on rotations, with the most notable being CPL Justin Huggett M.G. who was on EX Long Look and deployed with his exchange Unit, The Grenadier Guards as part of Operation Herrick. For his Actions on this deployment, he was awarded a MG.
Domestic & International Operations
2 RAR has provided assistance to numerous Domestic operations since 2011, including:
DCAC - OP Yasi Assist (2011)
2 RAR assist in the Cyclone Yasi aftermath
Fiji (2016) (2020-2021)
In 2016 as part of OP Fiji Assist, Joint Task Force 635 (JTF 635), 2 RAR (Amphib) deployed BHQ, Admin and SPT Coy to join with Engineers from Brisbane Units to help after the devastation of Cyclone Winston.
In 2020/2021 as part of OP Fiji Assist 20-21, B Coy, 2 RAR (Amphib) was recalled with 6 Platoon (Small Boats) deployed along with Command Element to Fiji to help after Cyclone YASA impacted.
DCAC - OP Queensland Assist (2017)
Soldiers allotted to this Engineer led group for clean-up in Airlie Beach after Cyclone Debbie
Papua New Guinea (2018)
Some 2 RAR (Amphib) soldiers deployed on OP APEC 18 Assist, these were 4 Platoon from A Coy, 2 RAR (Amphib), which deployed on HMAS Canberra in Support of APEC in Port Moresby
DCAC - OP North Queensland Flood Assist (2019)
2 RAR (Amphib), 83 members are allotted to JTF 658 to assist with flooding in Townsville, most notable, small boats rescue over 400 people from flood-stricken houses in Idalia. All members allotted are granted a Group Gold level commendation for their efforts
Philippines (2019)
2 RAR (Amphib) provided members to the Land Mobile Training Team (Land MTT). 2 RAR (Amphib) provided a HQ element, A Platoon of CB Shooting Instructors, A Sniper Pair Training Team and some support personal. In three rotations.
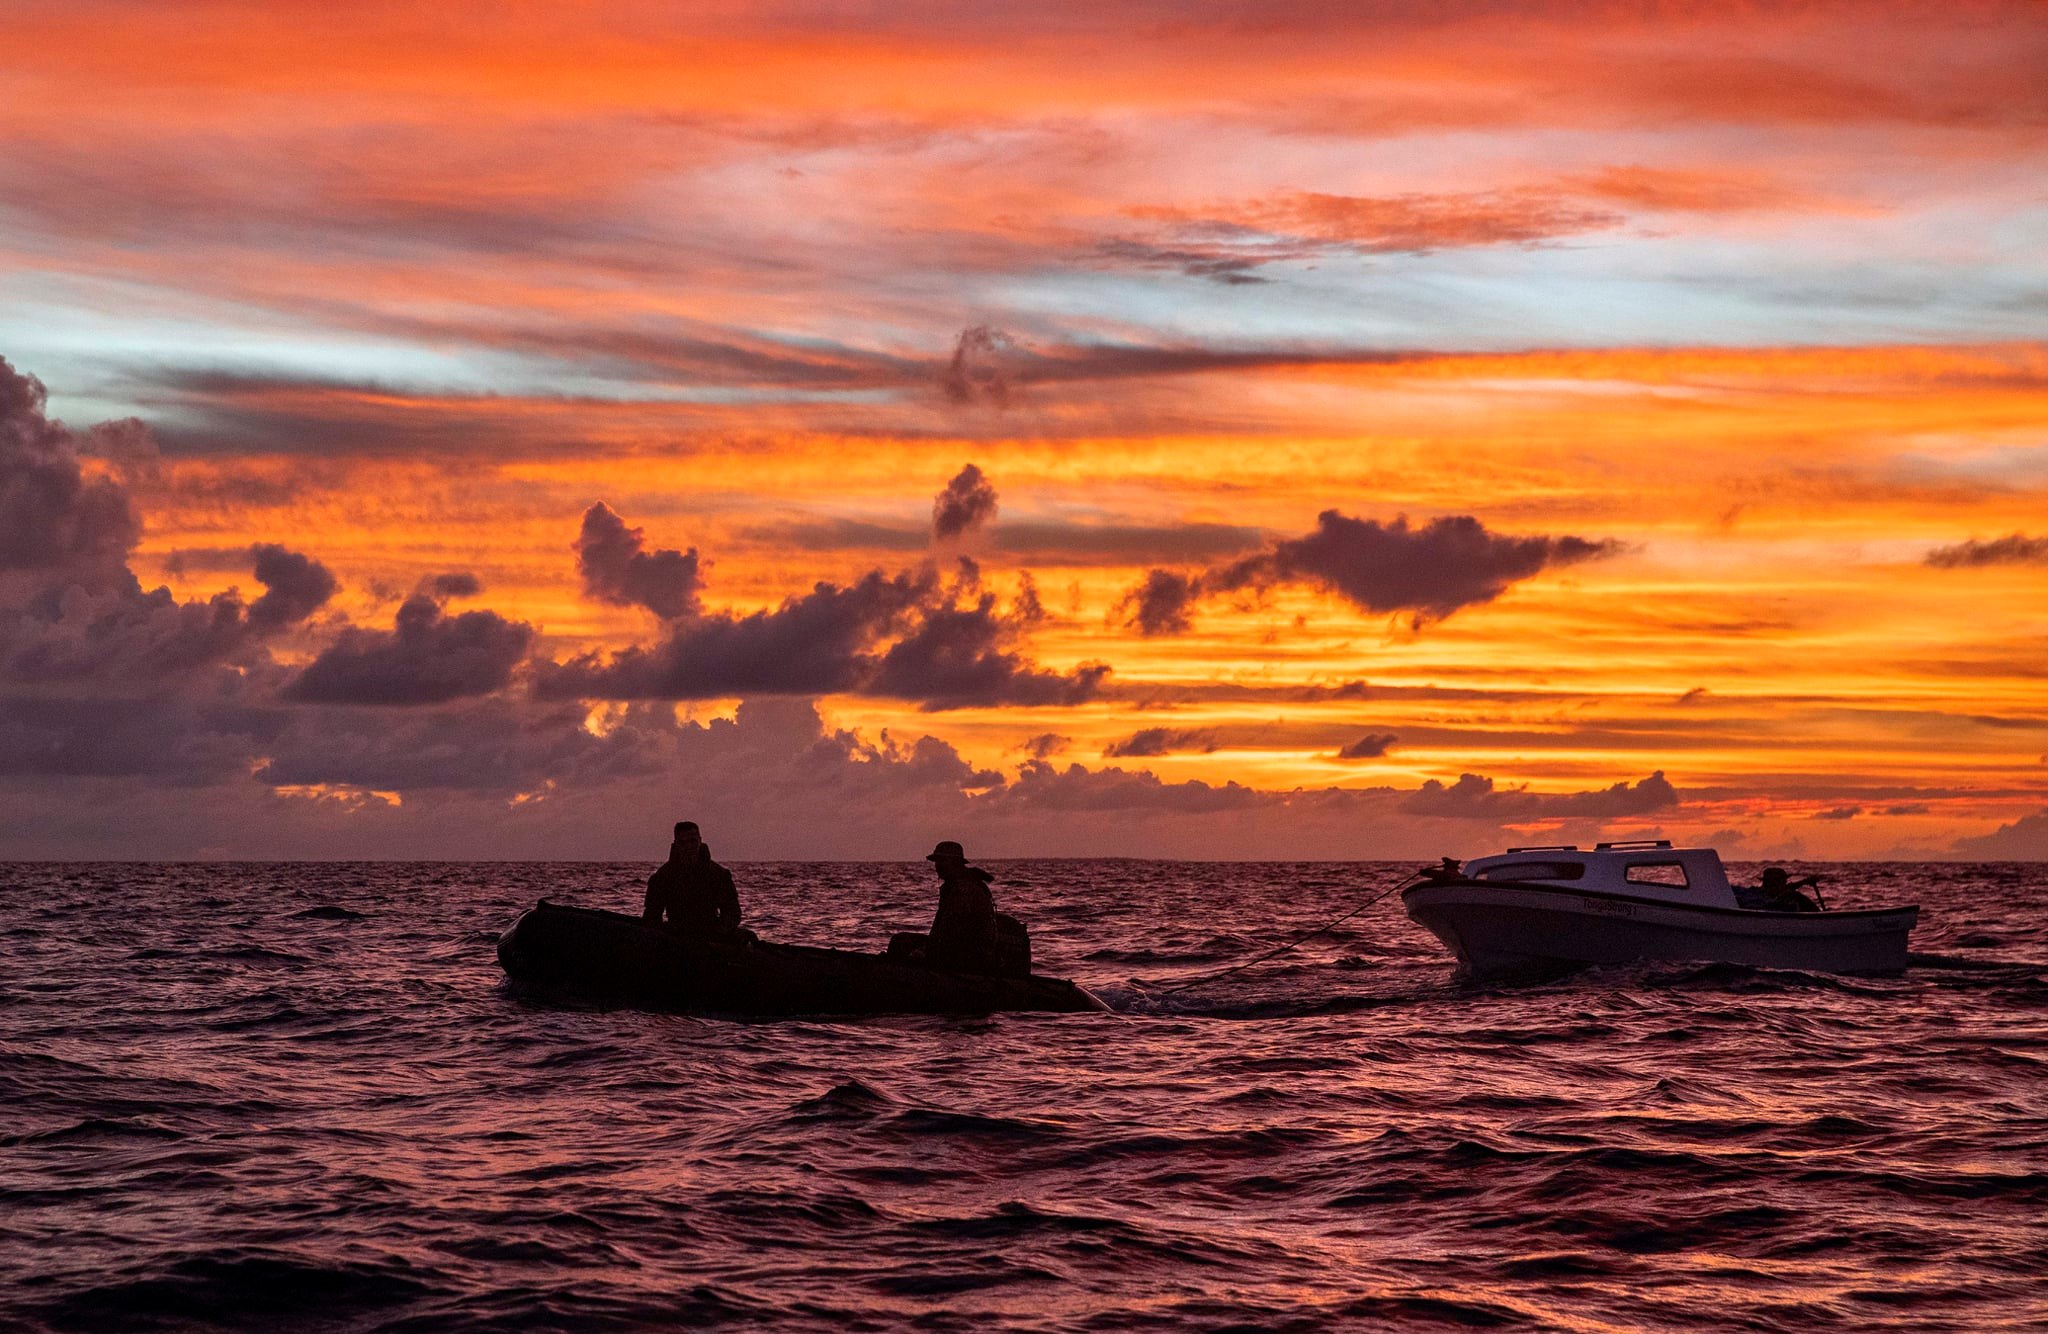
South Pacific (2020)
2 RAR (Amphib) provides 14 soldiers as part of the annual Operation (OP RENDER SAFE 2019) from Alpha Coy, 4 Platoon (Small Boats). They deploy HMAS Adelaide and HMAS Canberra, to the Solomon Islands, Tonga and Fiji
Tonga (2022)
A Task force was dispatched after the eruption of underwater volcano Hunga Tonga- Hunga Ha’apai on 15 January. 3 Platoon (Small Boats) from 2 RAR (Amphib) was dispatched as part of a JTF
DCAC - OP NSW Flood Assist (2022)
25 combined members from 4 and 5 platoon, B Coy with the 2IC of B Coy as the Commander attached to JTF 629.1
Vanuatu (2023)
As part of OP VANUATU ASSIST 2023, 6 Platoon (Small boats) deployed as part of a JTF to deliver more than 100 tones of humanitarian aid, including food, shelter and medical supplies, to the country in the wake of Tropical Cyclones Judy and Kevin